¶ em-smart Dual SE Setup & Installation
Placement Environment Requirements
To ensure the safe, stable operation and optimal performance of your em-smart Dual SE, please install it in an environment meeting the following requirements:
- Workbench: Use a solid, flat, and stable worktable with a recommended thickness of at least 2cm and dimensions no less than 100cm (L) x 80cm (W). It must support a load exceeding 50kg and have good vibration resistance.
- Space: Maintain a minimum clearance of 30cm at the rear and sides of the device for adequate heat dissipation, ventilation, and to facilitate maintenance and cable connections.
- Ventilation: Critical. The device must be placed in a well-ventilated area. It is strongly recommended to connect the official-specified or a performance-matched fume extraction system (e.g., exhaust hose and external smoke absorber) to promptly and effectively remove smoke and particulates generated during processing. This protects the laser optics and maintains a safe workspace.
- Ambient Conditions: The operating environment should be clean, dry, and free from excessive dust, oil mist, or corrosive gases.
- Lighting & Safety: Avoid direct sunlight or strong ambient light, which can interfere with the red positioning light. The equipment should be placed away from flammable materials, with appropriate fire safety equipment nearby.
¶ Power Specifications
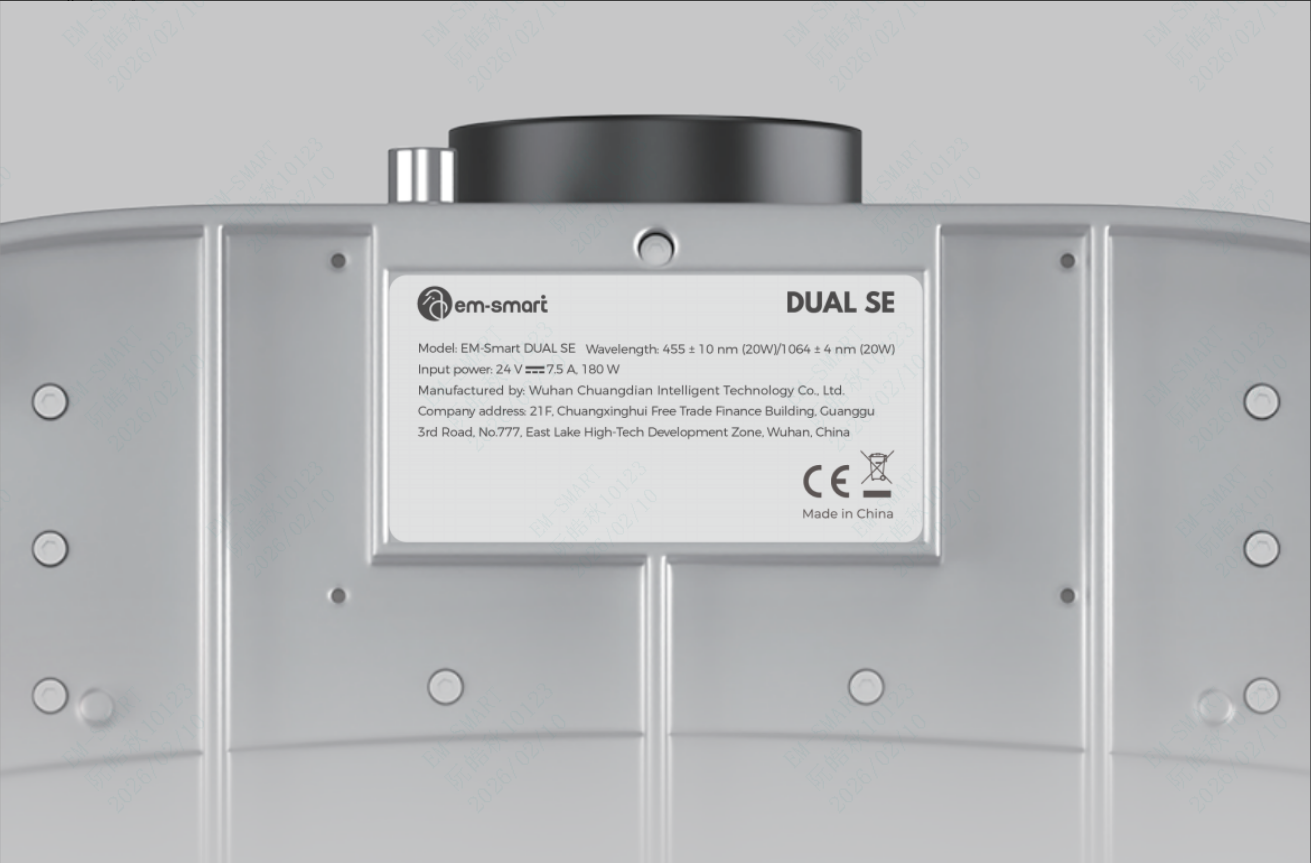
Use the dedicated power cable supplied with the equipment. The required input is 24V DC, 7.5A, with a maximum power of 180W. Before connecting, always verify the exact parameters on the device’s power adapter or nameplate.
¶ Machine Setup
Remove the protective cover from the field lens before use. If you will not use the machine for a long period, you can reinstall the cover to prevent the field lens from accumulating dust. Ensure that the protector is removed every time before you operate the machine.
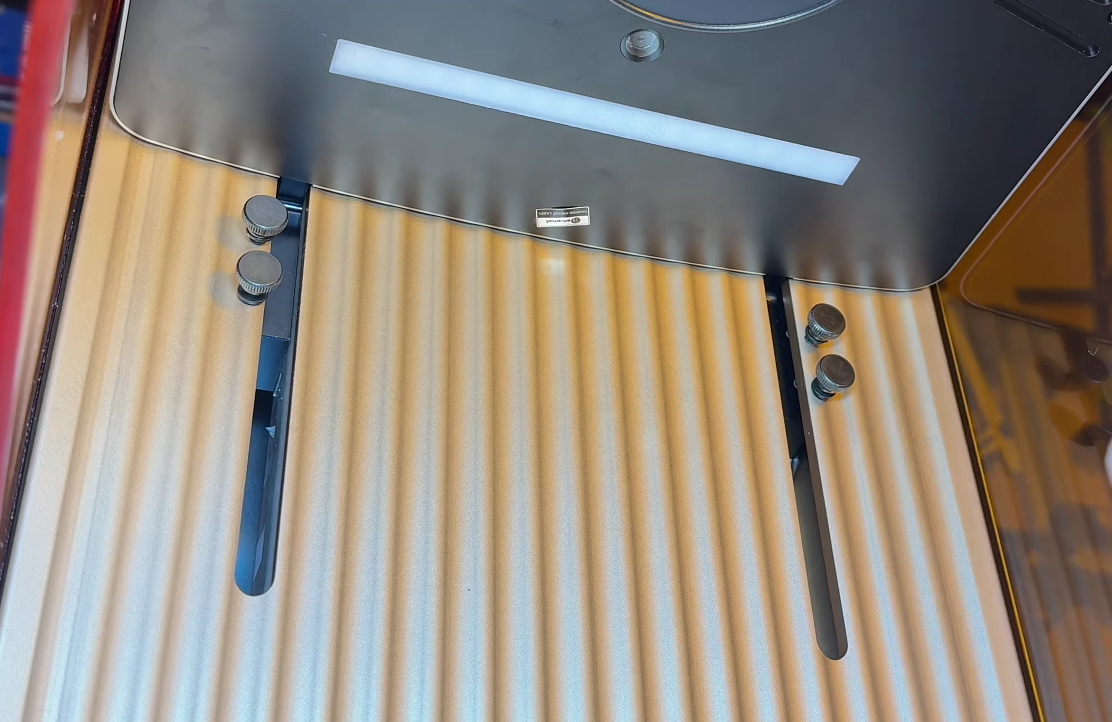
The limit screws (shown in the image) serve to stabilize the lifting unit. Ensure they are correctly positioned to prevent any tilting of the assembly, which maintains focal accuracy across the marking area.
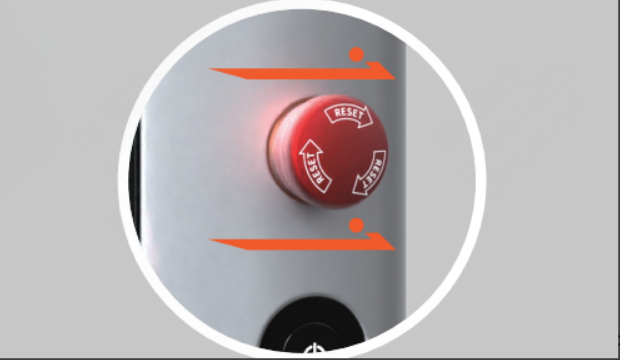
Verify that the emergency stop switch is released. If pressed, twist the knob to reset the switch before powering on.
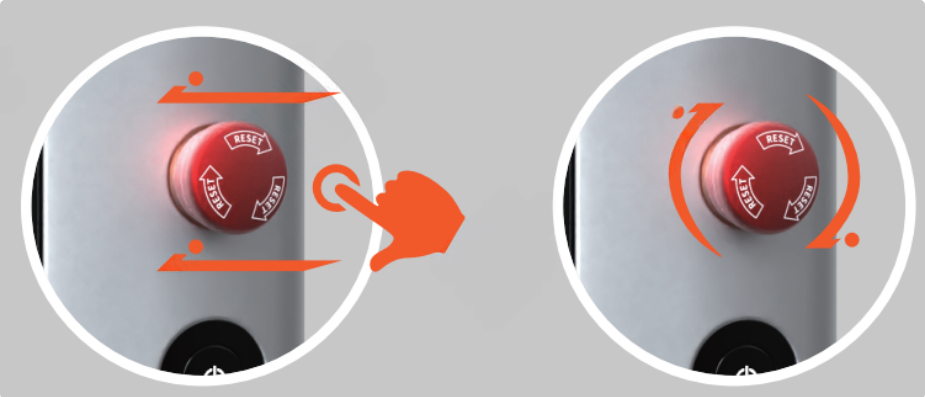
In case of an emergency, press the emergency stop switch immediately to shut down the machine (as shown on the left). Once the emergency has been resolved, rotate the switch to reset it (as shown on the right).
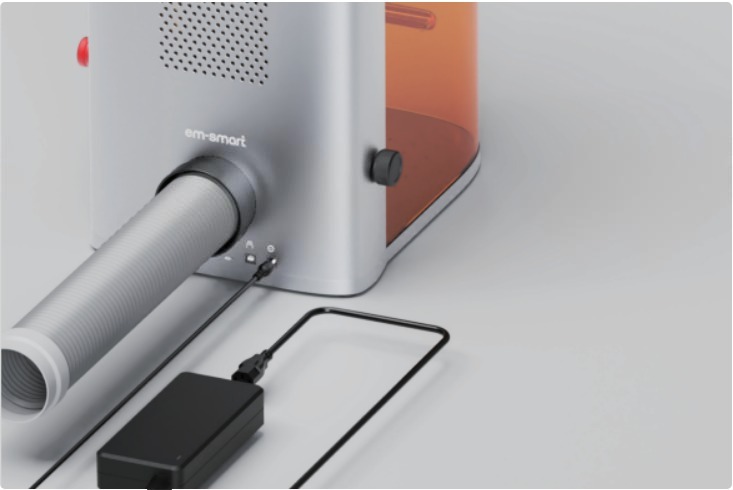
Next, install the extraction pipe and connect the power supply. First, ensure the emergency stop button is in the released position. Then, press and hold the power switch for 3–5 seconds until the fan starts, indicating the machine is powered on.
¶ LightBurn Software Installation Guide
Both em-smart machines use LightBurn software which is useful and vivid for laser engraver users. We provide a step-by-step installation guide:
¶ Power on and Set Software
Press the power switch to start em-smart Dual SE and then cinfigure the software. Copy and paste LightBurn software from em-smart USB flash drive. And remember to install the EZCAD2 driver during the software installation process.

After installing the LightBurn software, first right click on “My Computer” and click “Device Manager”. Next, find the “USBLMCV2” device in the list - it should be near the bottom, under “Universal Serial Bus devices”.
Then right click to update driver, choosing “Browse my computer for drivers”, where you can install the EZCAD2 drivers for LightBurn.
After installing the driver, open LightBurn software:

Then you enter into the interface and click “Devices” in the bottom right corner of the interface.

Select “Find My Laser”, choose JCZFiber, and add the device. Click “Next” in the bottom right corner of the interface.
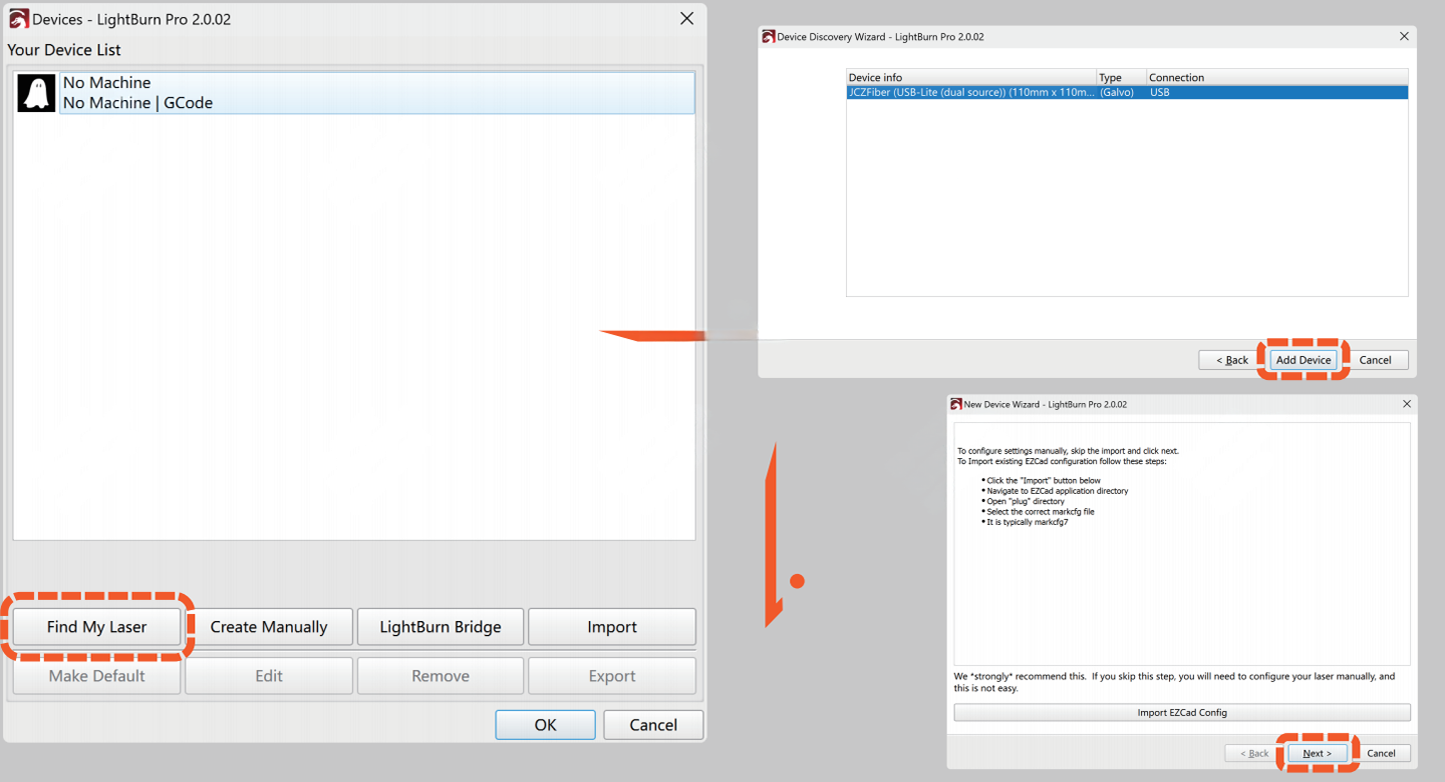
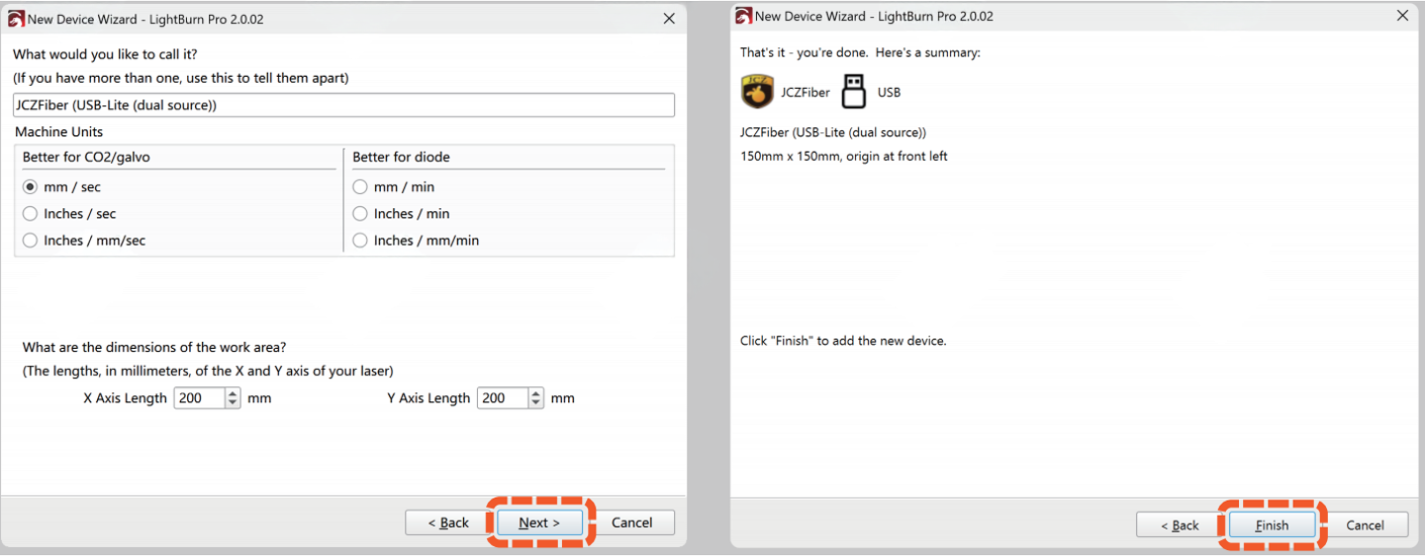
All the related files are included in em-smart USB flash driver. Modify the device name and working area size if needed, then click “Next”, complete the process by clicking “Finish”.
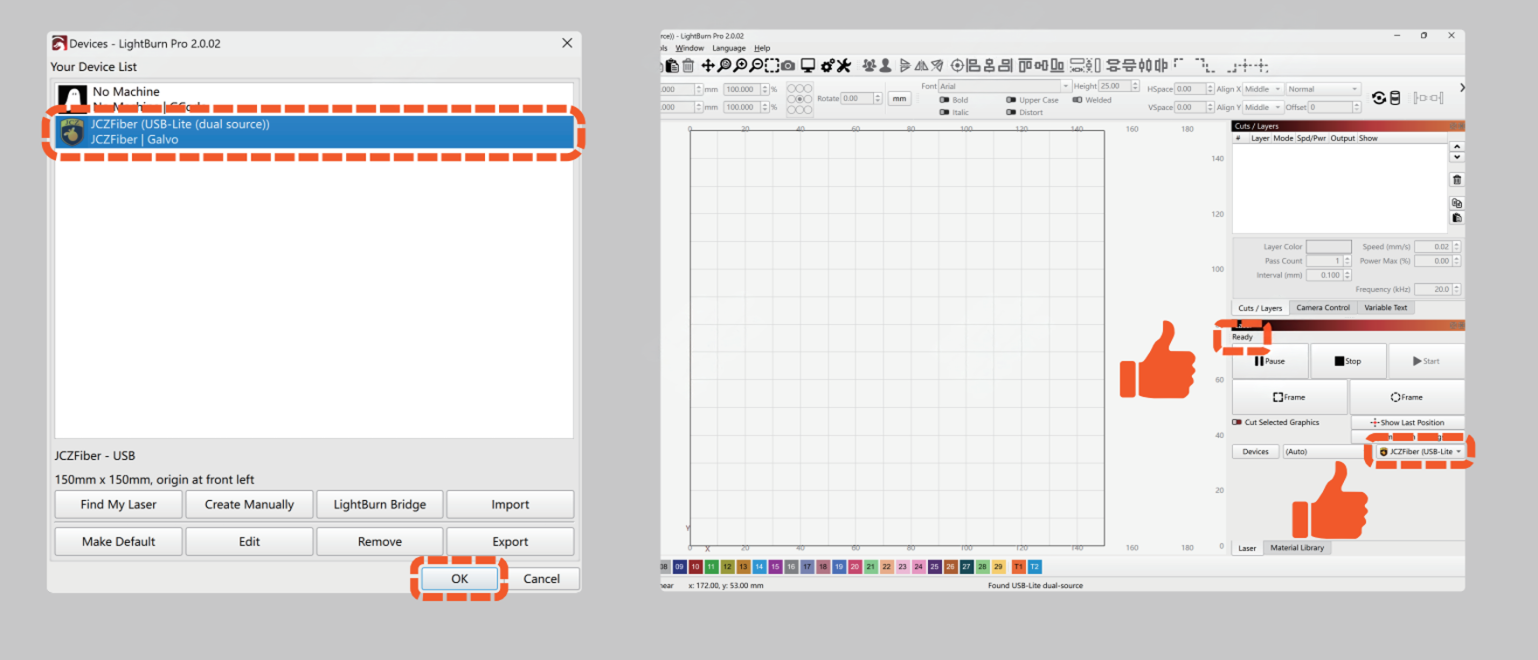
In the Device List, select the “JCZFiber” device (the name may vary if it has been previously renamed). Once successfully connected, the status in the Laser Window/Device Window will change to "Ready”.
¶ Complete Parameter Settings
Configure the port and laser parameters as shown in the image below. To prevent laser radiation, please ensure the “Door Protect” function is enabled before operation. To enable this feature, set the port to “14” and the signal level to “Low” (the default setting is “No”).

Switching between Fiber and Diode Lasers: After importing your SVG files, double-click the layer in the Cuts / Layers window to open the Cut Settings editor. Click the “Use Laser 2” button to toggle between the fiber and diode lasers. When the button is highlighted in green, the diode laser is active.

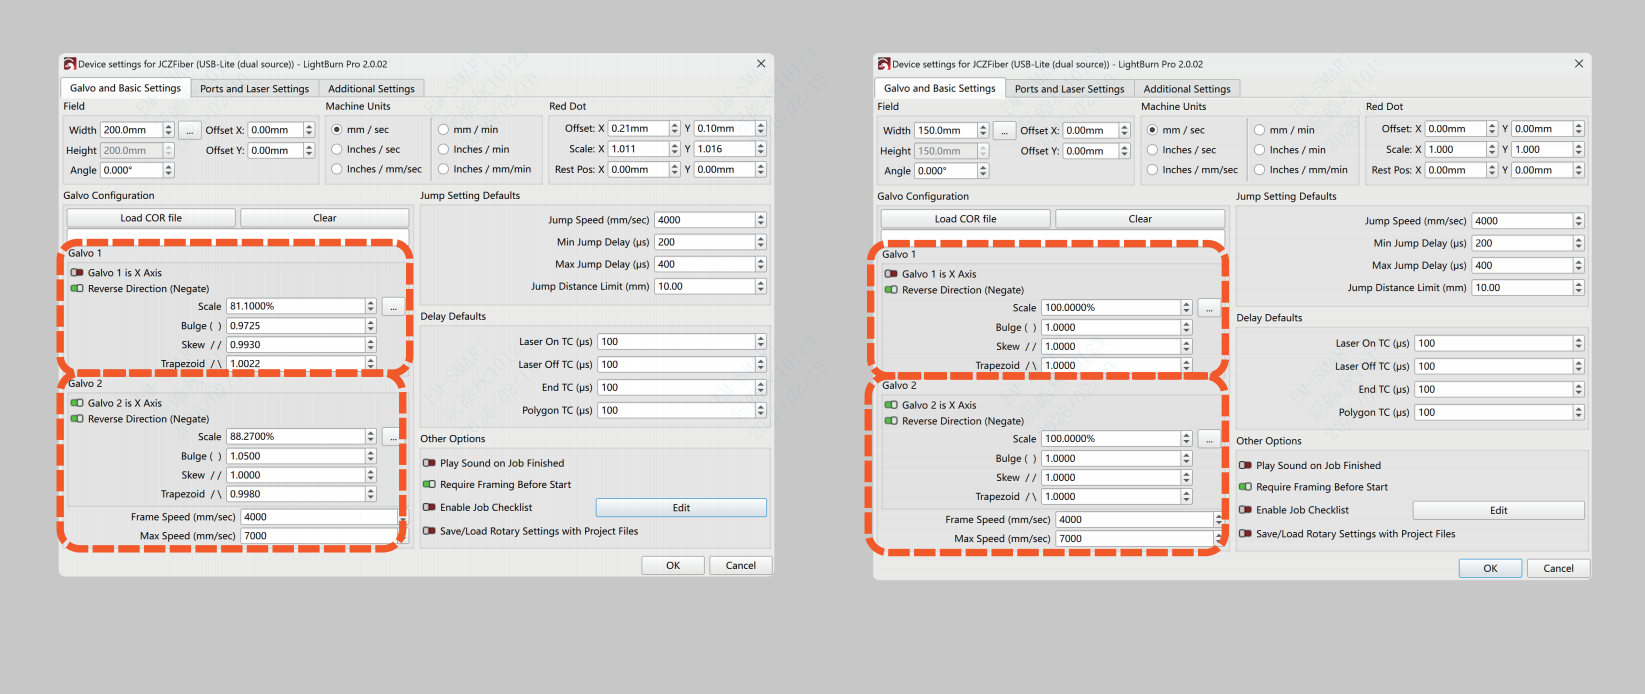
Calibrate the Galvo parameter settings using the standard values provided in the “Serial Number” image located on your USB drive. The parameters shown below are for reference only. Please ensure the settings in LightBurn match the EZCAD parameters exactly.
¶ Summary
Above these standardized procedures for hardware installation, driver configuration, and parameter calibration ensures that em-smart Dual SE maintains optimal performance and operational safety. Your system is now fully configured and ready for precision marking applications.
¶ Related Reading:
em-smart Dual SE Laser Engraving & Software Operation Guide